# Adding Custom Fields Data (Metafield Data) to the Product Page
This is advanced guide, so please make sure you have understand our app well before going forward. If you are still not sure or have not gone through ACF’s basic knowledge, we recommend you go to Advanced Custom Field.
Our examples were created on Shopify’s Debut theme. These examples require to edit theme code, so users need to have some coding knowledge. Different theme may also has different source code but overall the theme structure should be the same since they are all Shopify themes.
In case you have problem applying any examples here to your theme, please submit a support request via our Support Portal; or send email to [email protected].
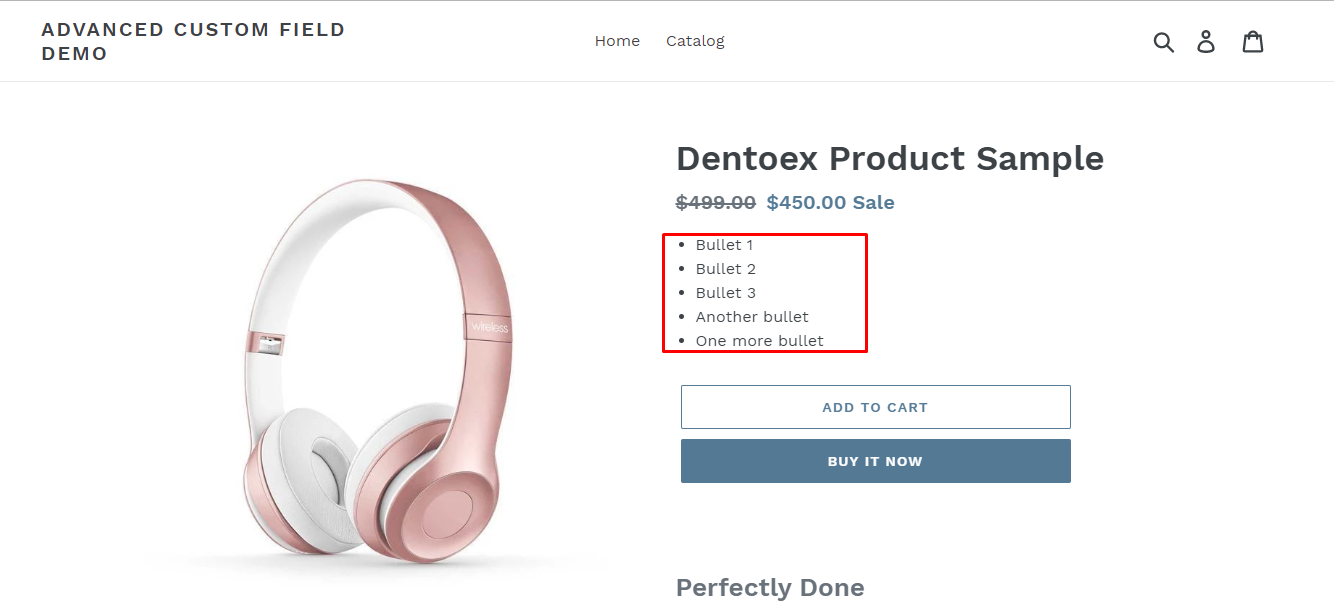
# ◾️ Displaying Custom Fields as Bullet Points on Product Pages
In this advanced guide, we’ll show you how to use ACF to create a bullet list displayed to customers on products. This is another example to show you how you can utilize ACF.
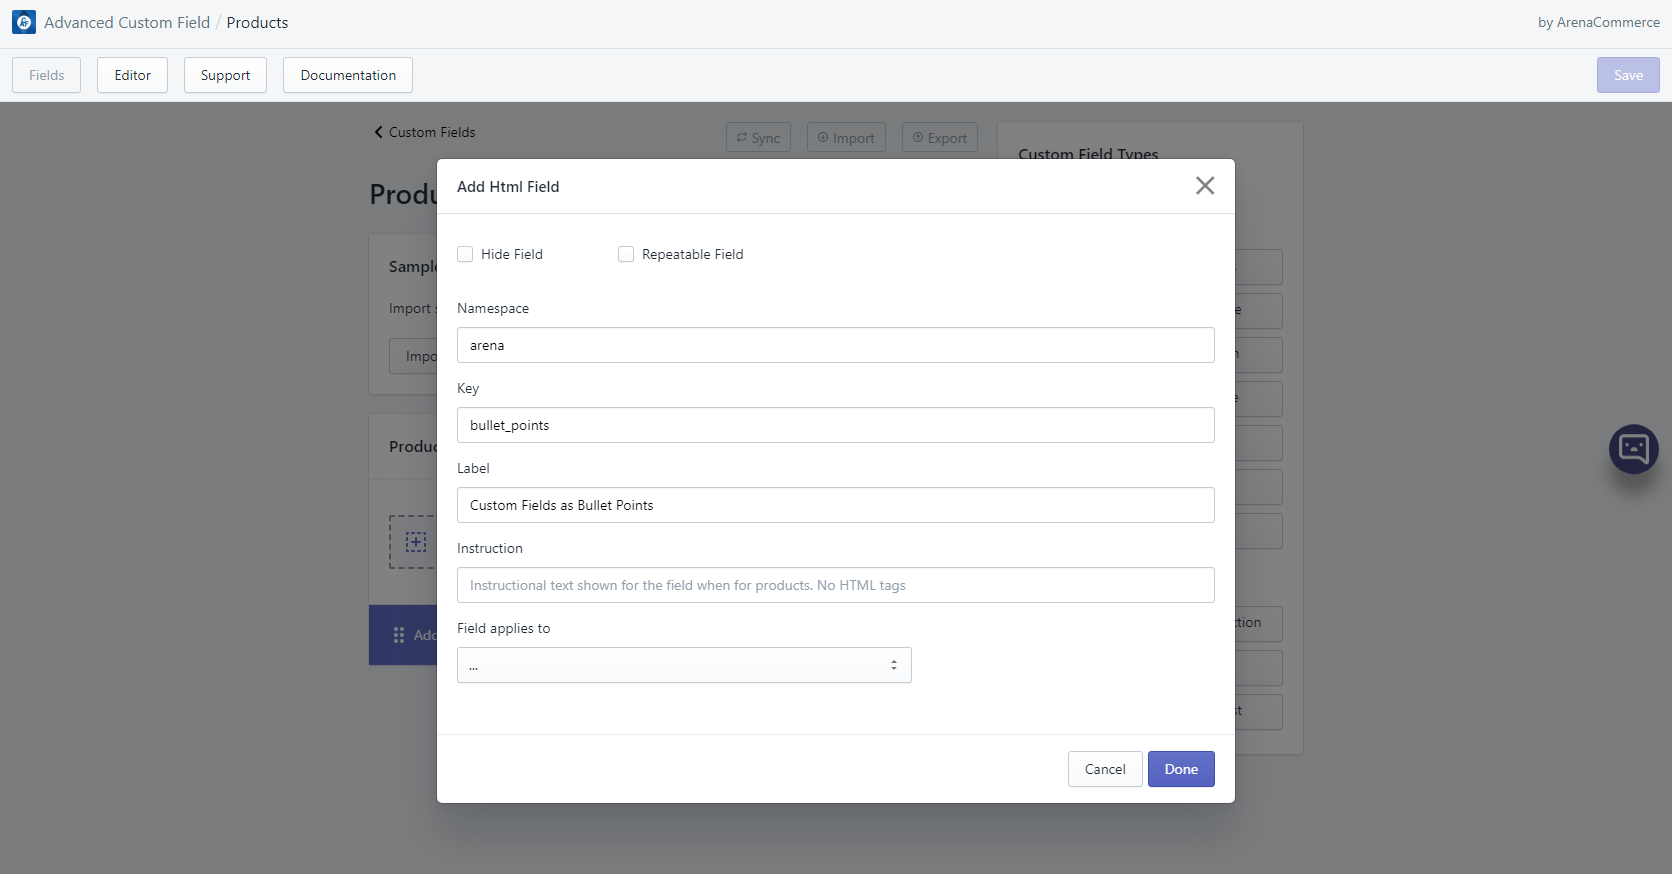
Step 1: At Fields tab, choose resource Products and create a HTML field.
Step 2: Click Save button to save your changes; then go to Editor tab’s resource Products and pick a product to start with.
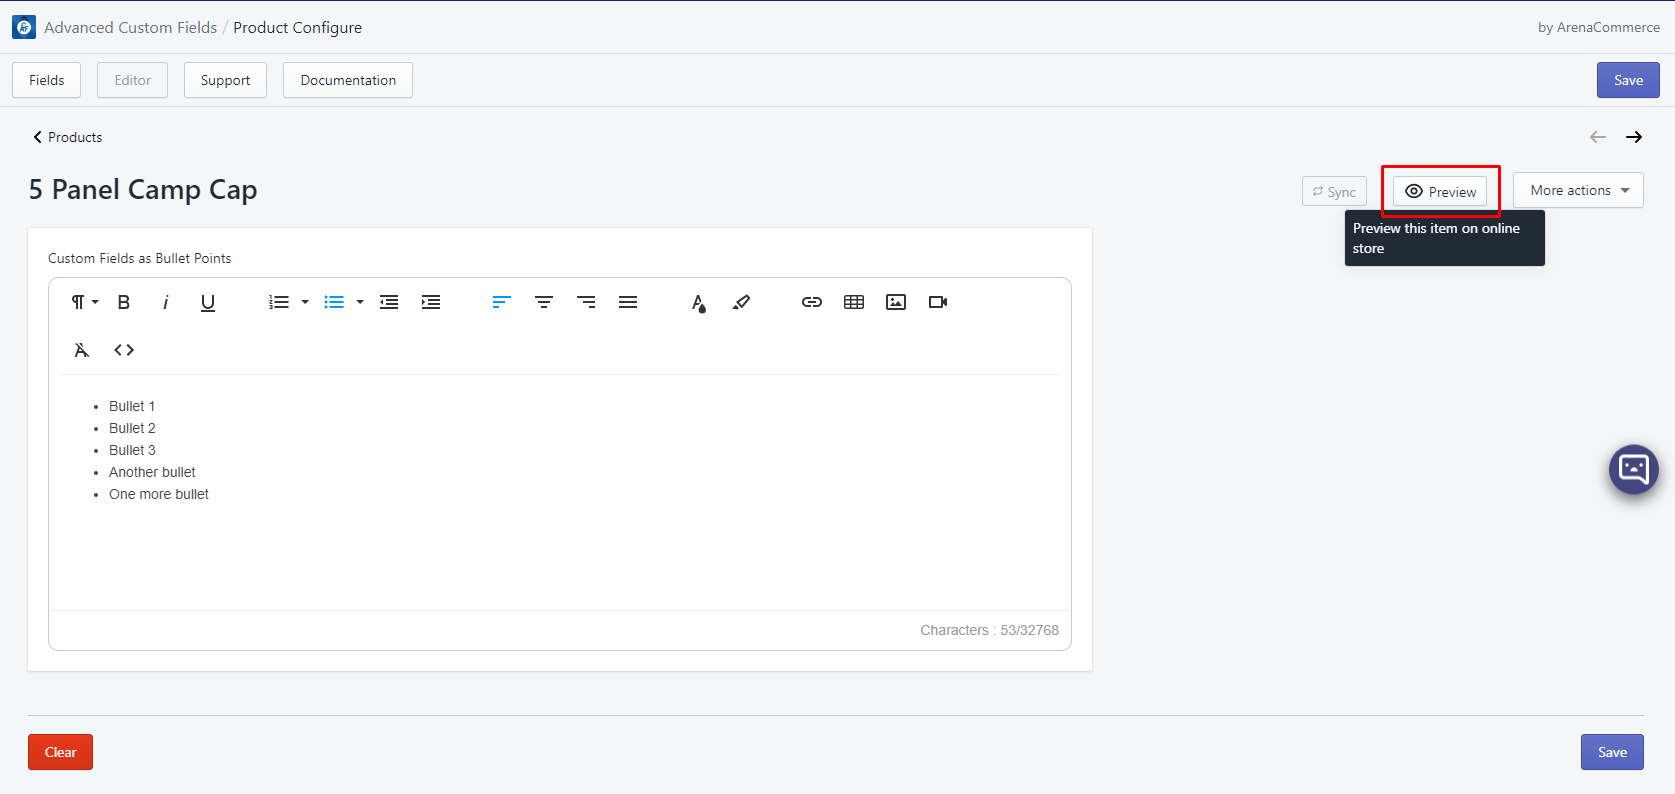
Step 3: On next page, click Unordered List and add content you want.
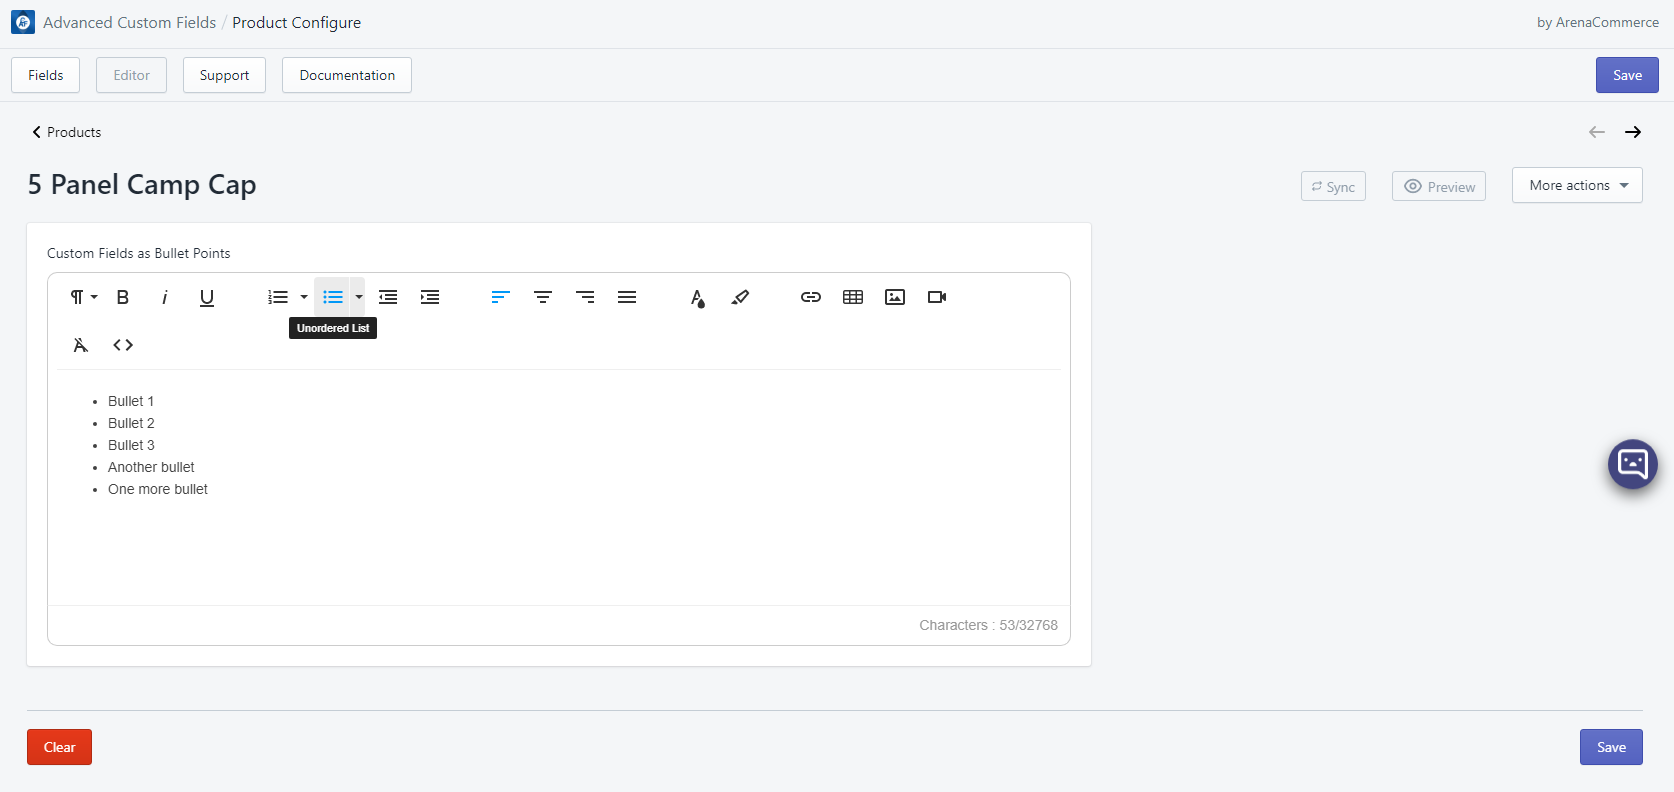
Step 4: Click Save button to save your changes.
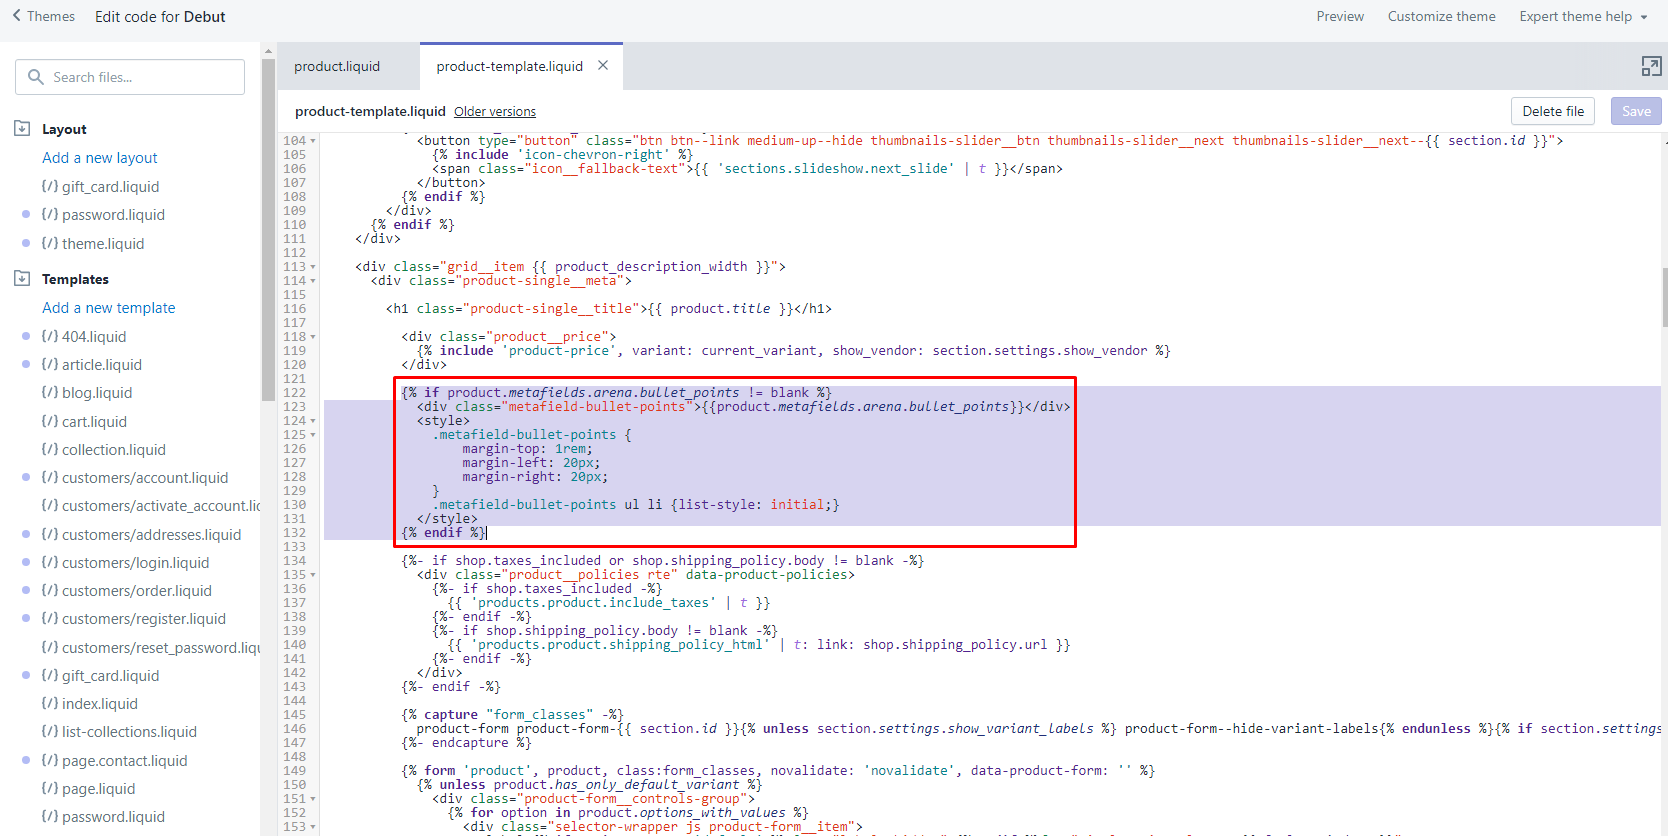
Step 5: Go to Edit code, open file product-template.liquid. In that file, search keyword product__price, then add the following code:
{% if product.metafields.namespace.key != blank %}
  <div class="metafield-bullet-points">{{product.metafields.namespace.key}}</div>
  <style>
    .metafield-bullet-points {
        margin-top: 1rem;
        margin-left: 20px;
        margin-right: 20px;
    }
    .metafield-bullet-points ul li {list-style: initial;}
  </style>
{% endif %}
- Step 6: Click Save button to save your changes.
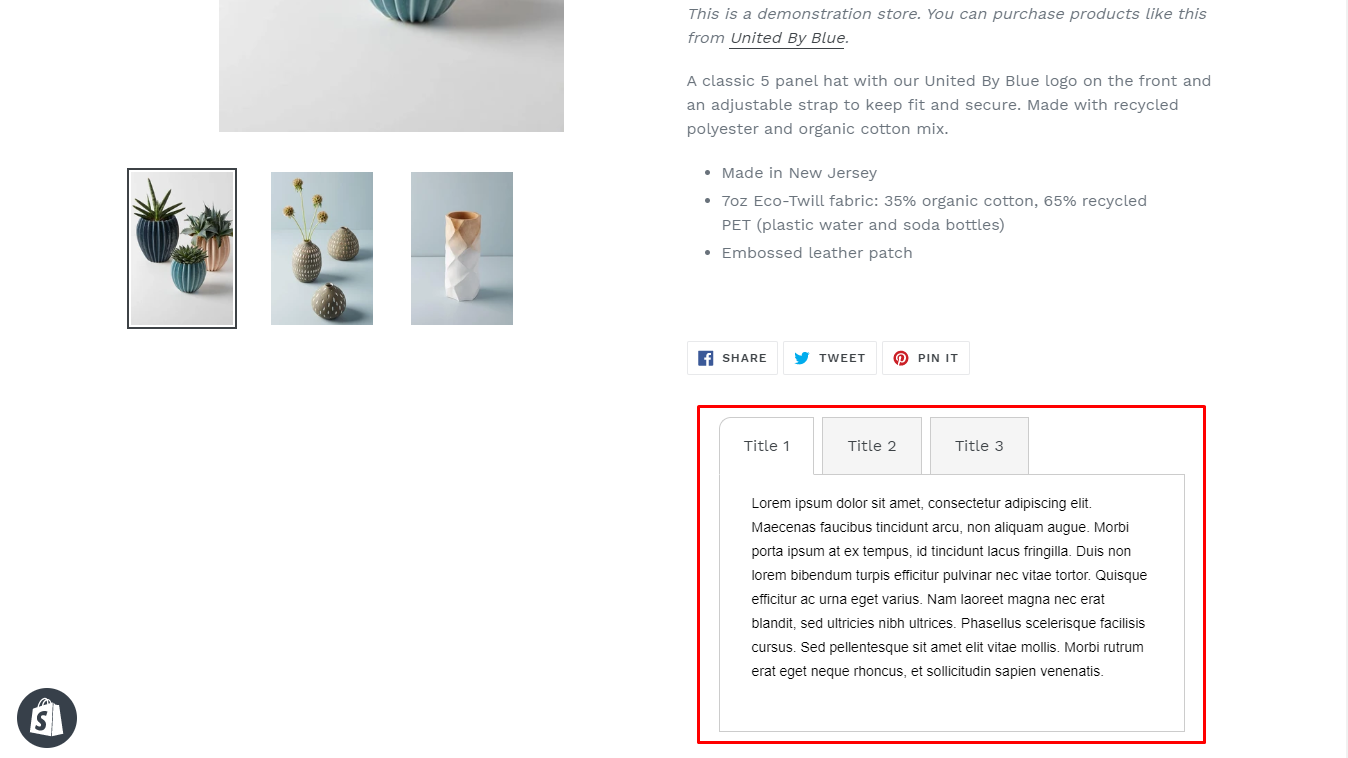
If the above steps are done correctly, the result should be displayed on corresponding product page.
TIP
Click Preview button to quickly jump to corresponding product page.
# ◾️ Creating a Simple Shipping Policy on Product Pages
In this advanced tutorial, we will guide you through how to create a product field to display as a per-product shipping policy for your customers. This can be useful if you have different shipping times for different types of products.
In this example, we will show you how to achive this:
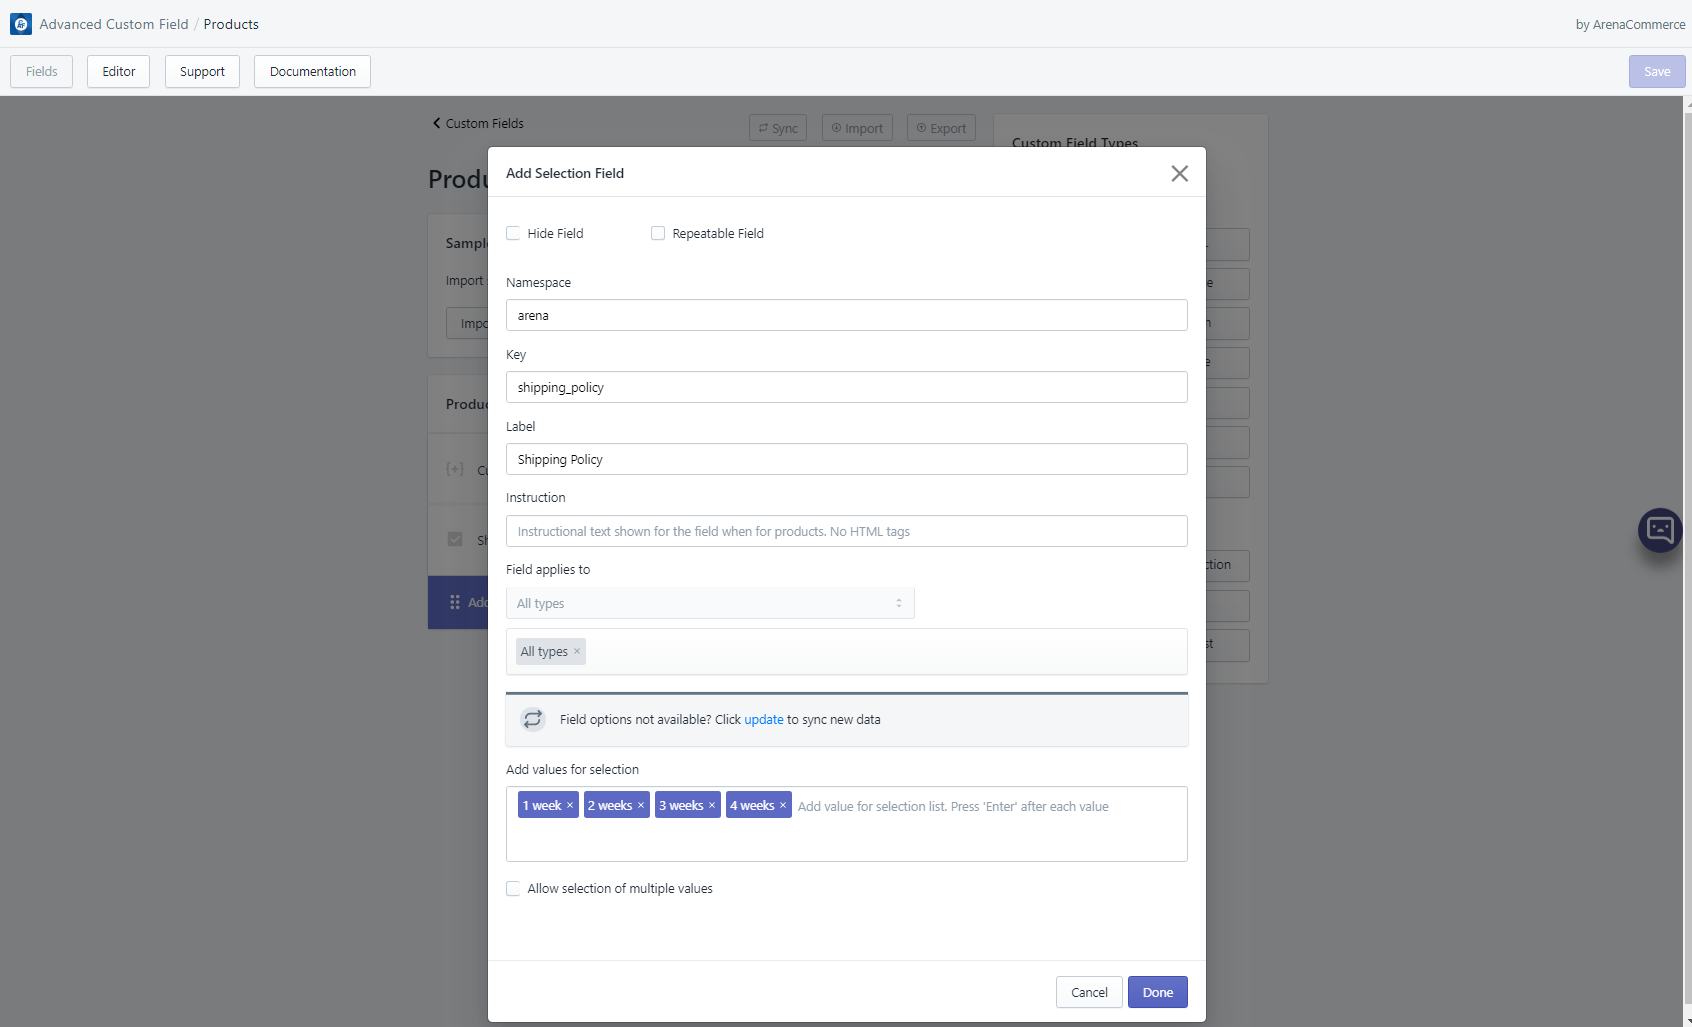
- Step 1: At Fields tab, choose resource Products and create a Selection field.
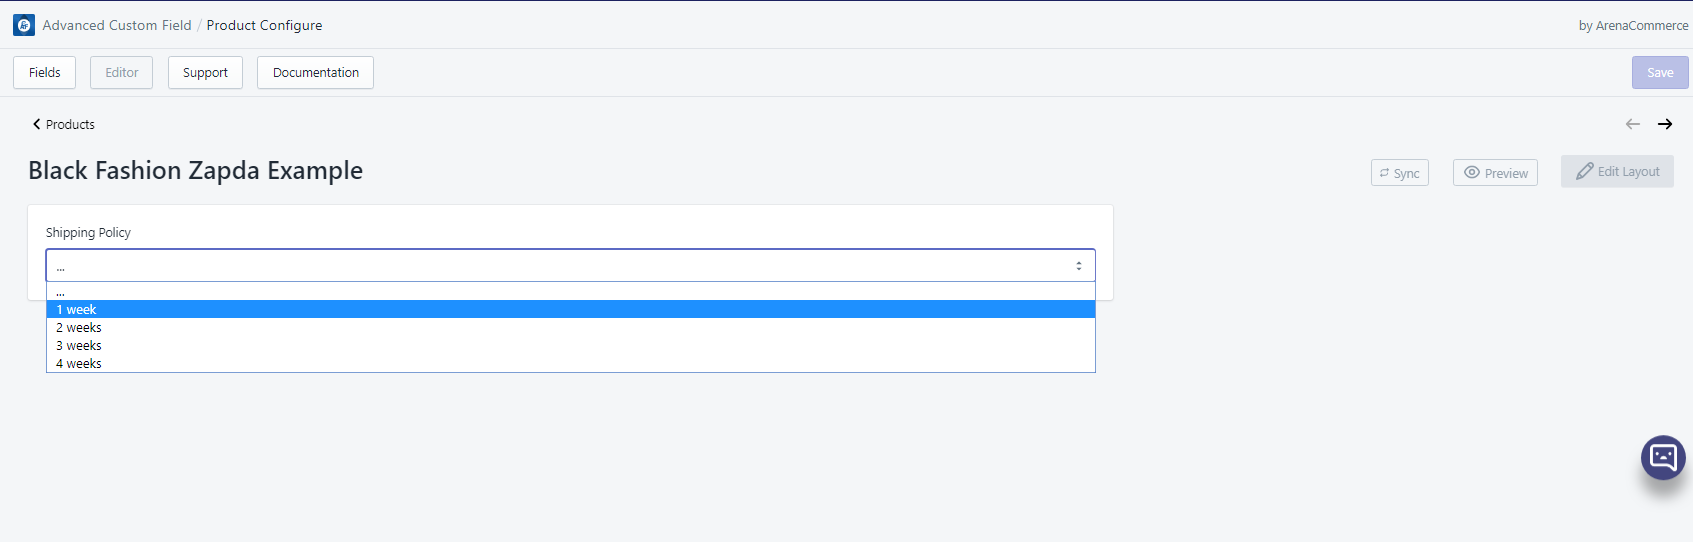
- Step 2: Click Save button to save your changes; then go to Editor tab’s resource Products and pick a product to start with.
- Step 3: Pick an shipping policy option for your product variant. When everything is fine, click Save button to save your changes.
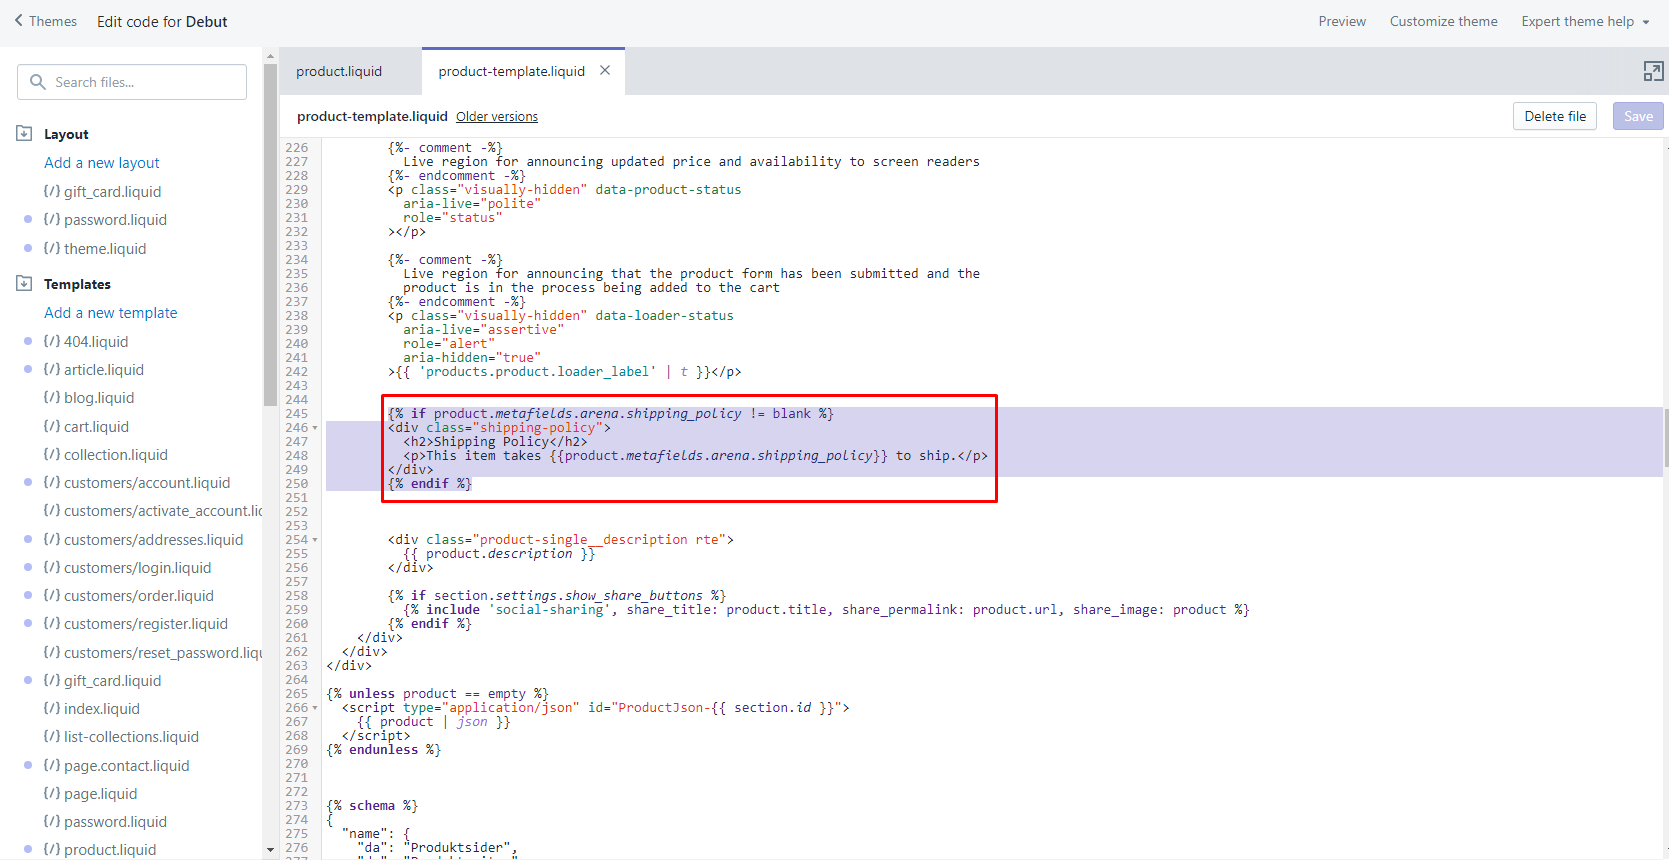
- Step 4: Go to Edit code, open file product-template.liquid. In that file, search keyword product-single__description, then add the following code:
{% if product.metafields.namespace.key != blank %}
  <div class="shipping-policy">
    <h2>Shipping Policy</h2>
    <p>This item takes {{product.metafields.namespace.key}} to ship.</p>
  </div>
{% endif %}
- Step 5: Click Save button to save your changes.
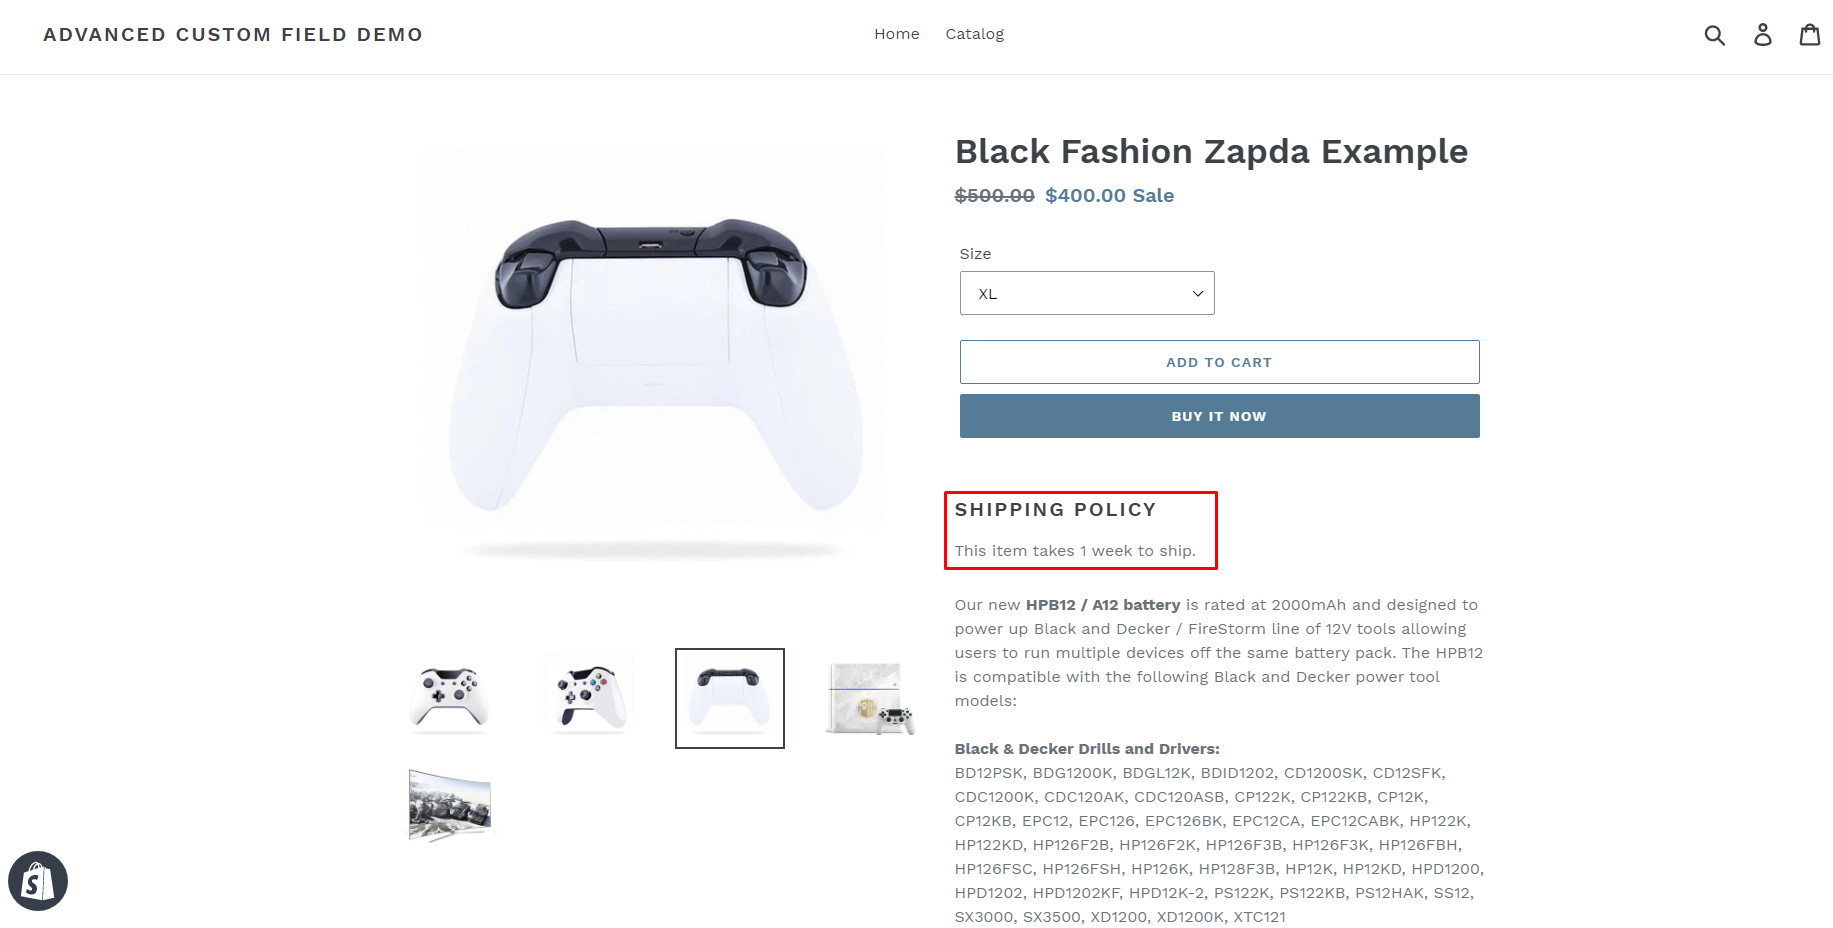
If the above steps are done correctly, the result should be displayed on corresponding product page.
# ◾️ Displaying Text Based on a Checkbox Value on Product Pages
Theme designers can completely control the output and placement of any custom field in the app using some advanced techniques.
Some possible uses include creating a banner image on every product page, creating a header message area, showing different icons based on product attributes, and many other custom uses.
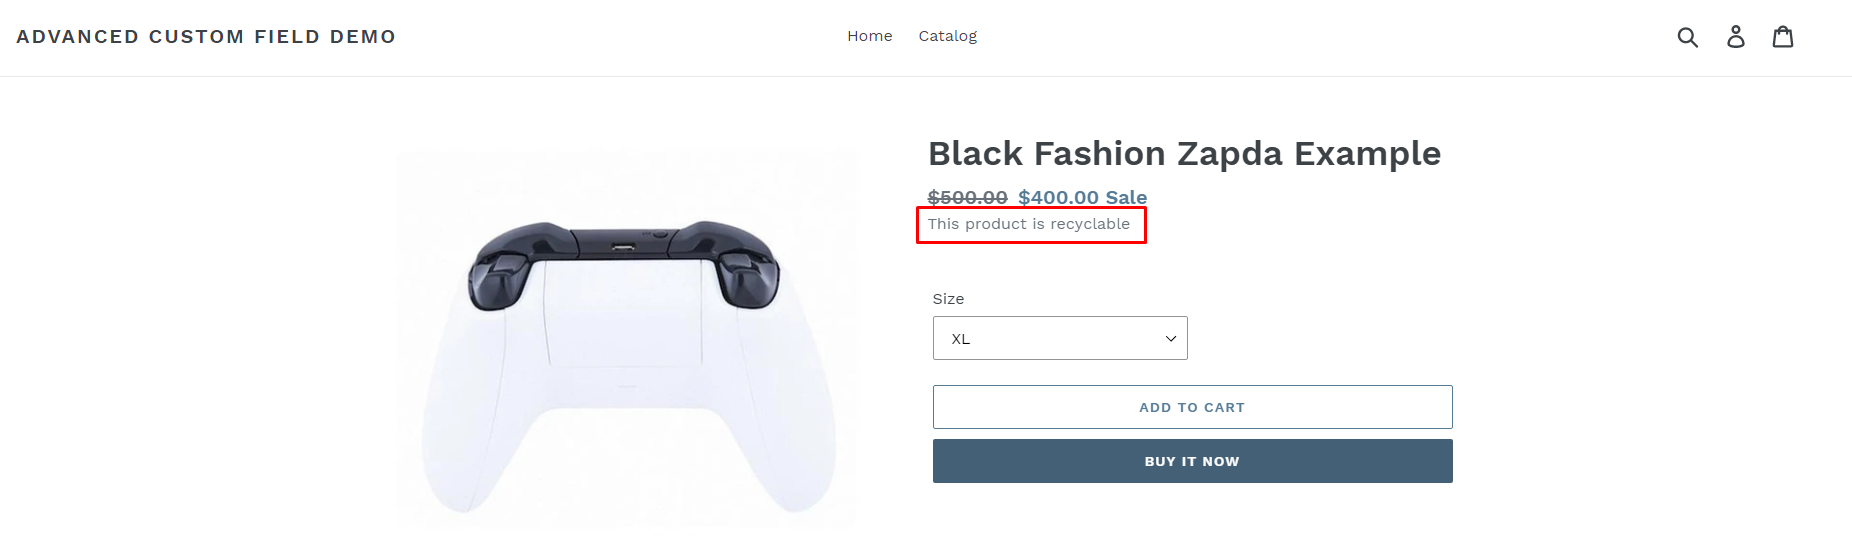
In this example, we’ll add a checkbox to our products that will show one message if checked and another if it’s not checked, but you can adapt this example for many other uses.
- Step 1: At Fields tab, choose resource Products and create a Checkbox field.

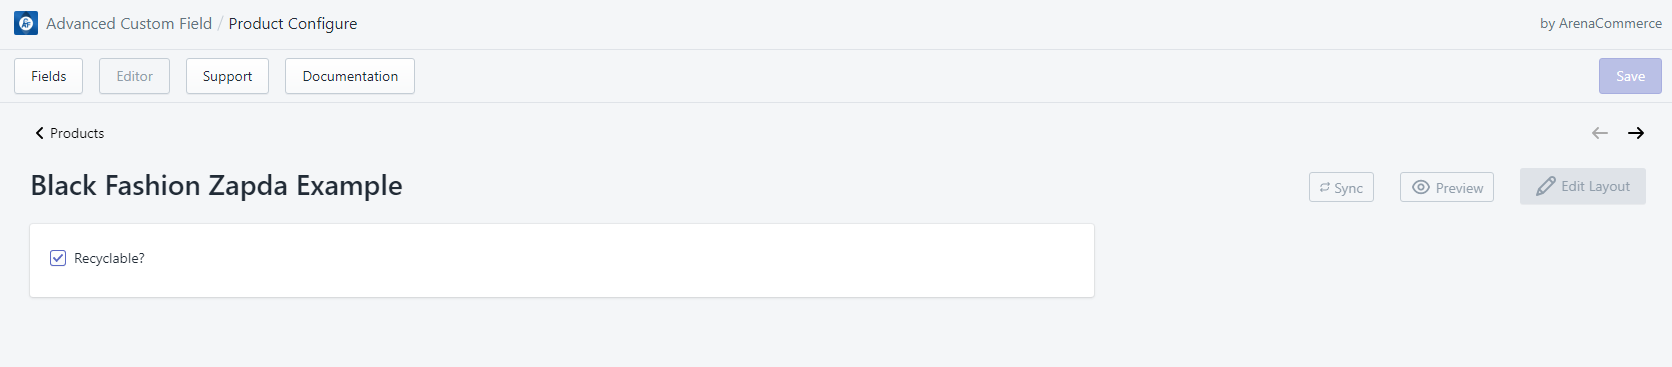
- Step 2: Click Save button to save your changes; then go to Editor tab’s resource Products and pick a product to start with.
- Step 3: Check the Recyclable? and click Save to save your changes.
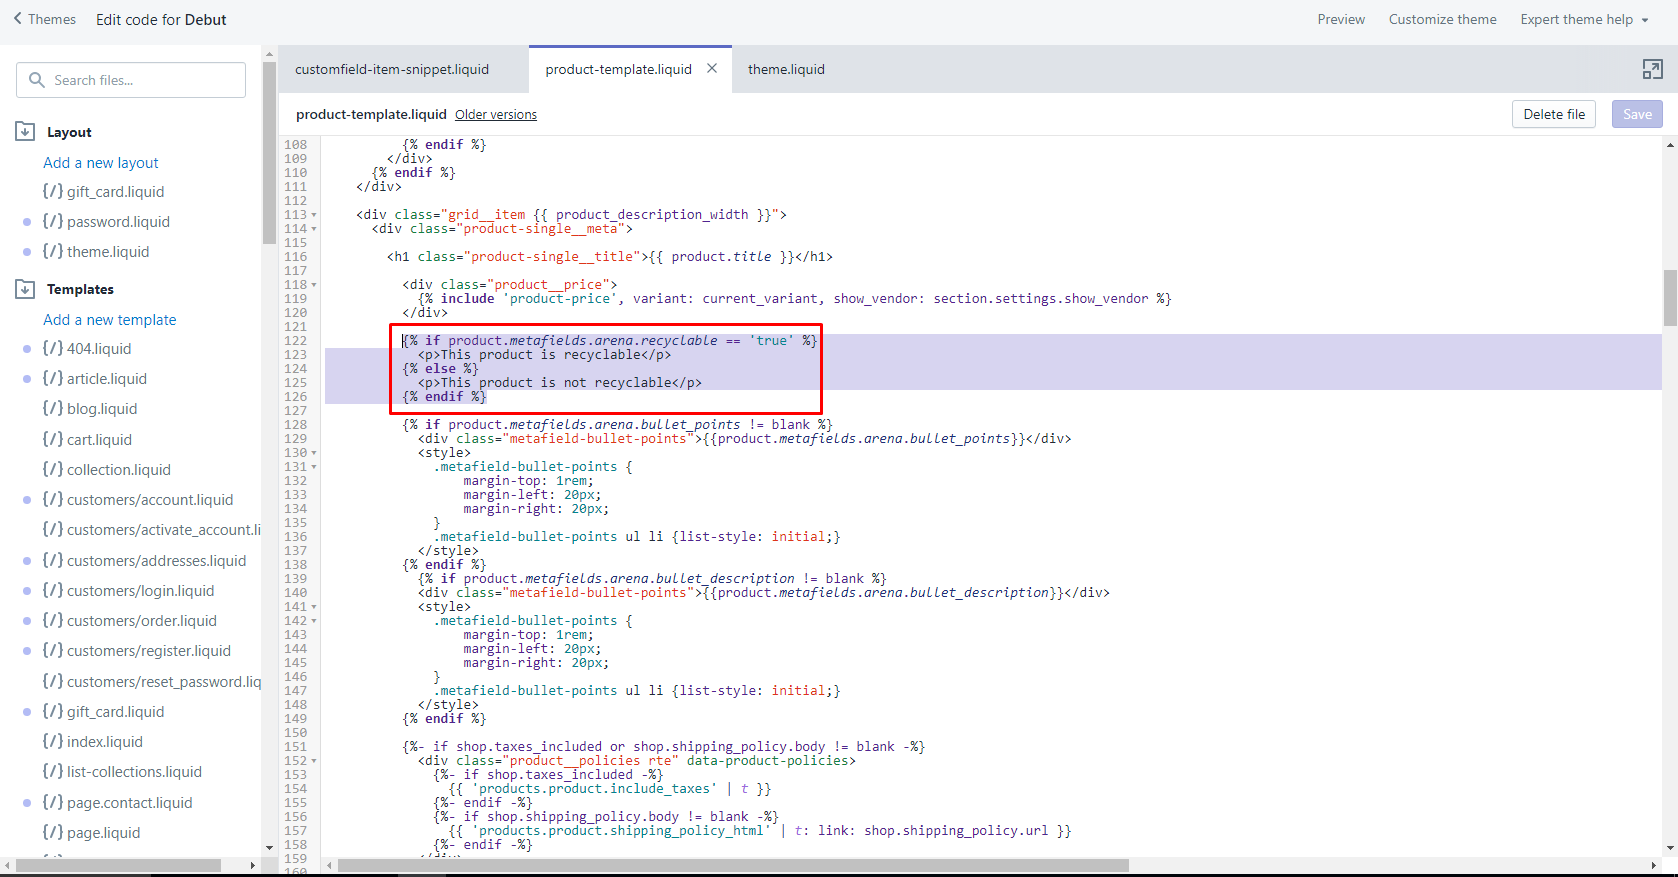
- Step 4: Go to Edit code, open file product-template.liquid. In that file, search keyword product__price, then add the following code:
{% if product.metafields.namespace.key == 'true' %}
  <p>This product is recyclable</p>
  {% else %}
  <p>This product is not recyclable</p>
{% endif %}
- Step 5: Click Save button to save your changes.
If the above steps are done correctly, the result should be displayed on corresponding product page.
# ◾️ Displaying Product Tabs on Product Pages
In this advanced guide, we’ll show you how to use ACF to create a product tabs.
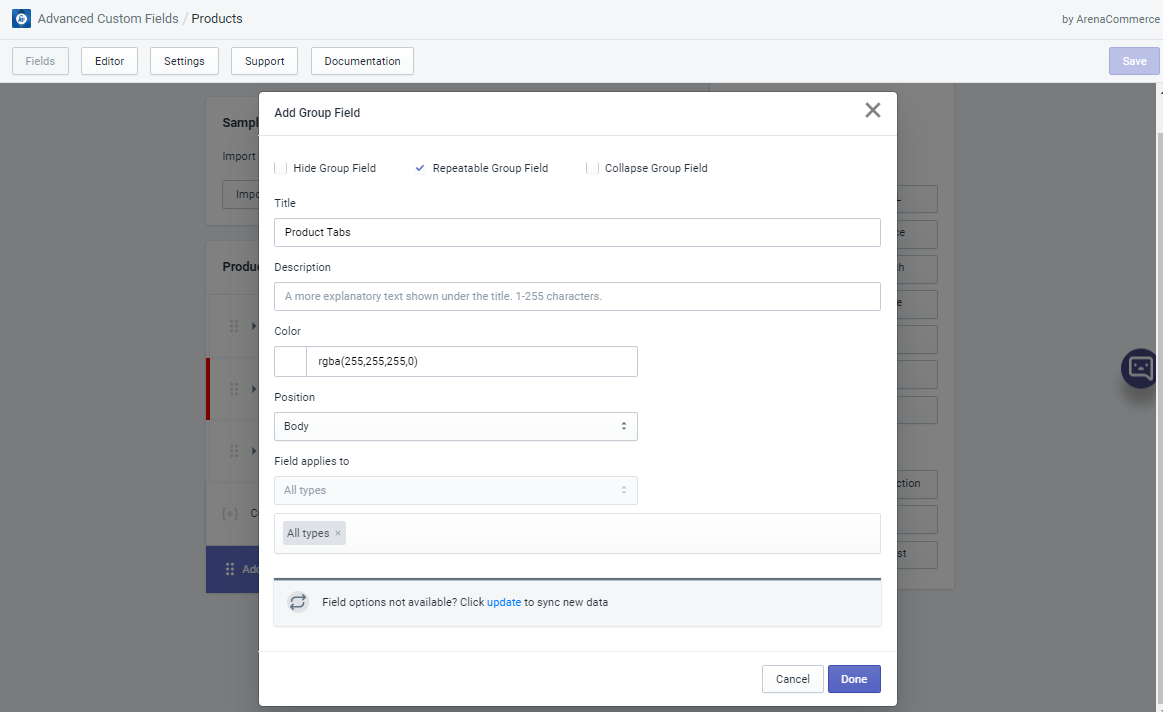
- Step 1: At Fields tab, choose resource Products and create a new group.
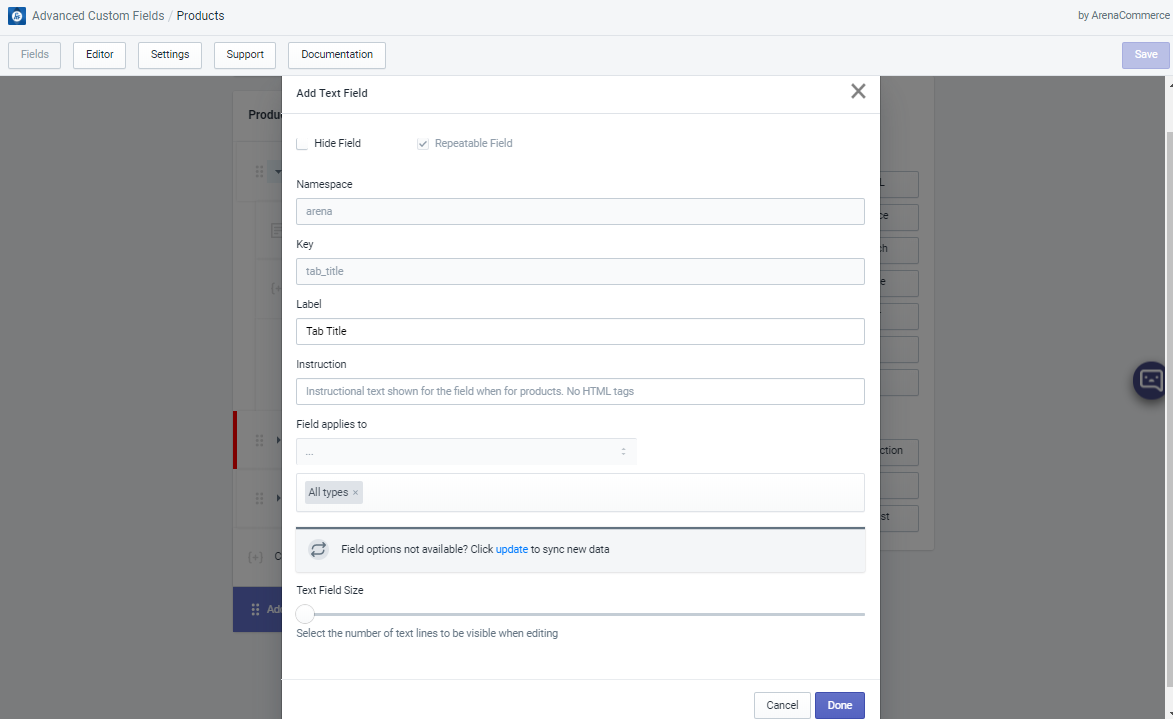
- Step 2: In newly created group, add a Text field
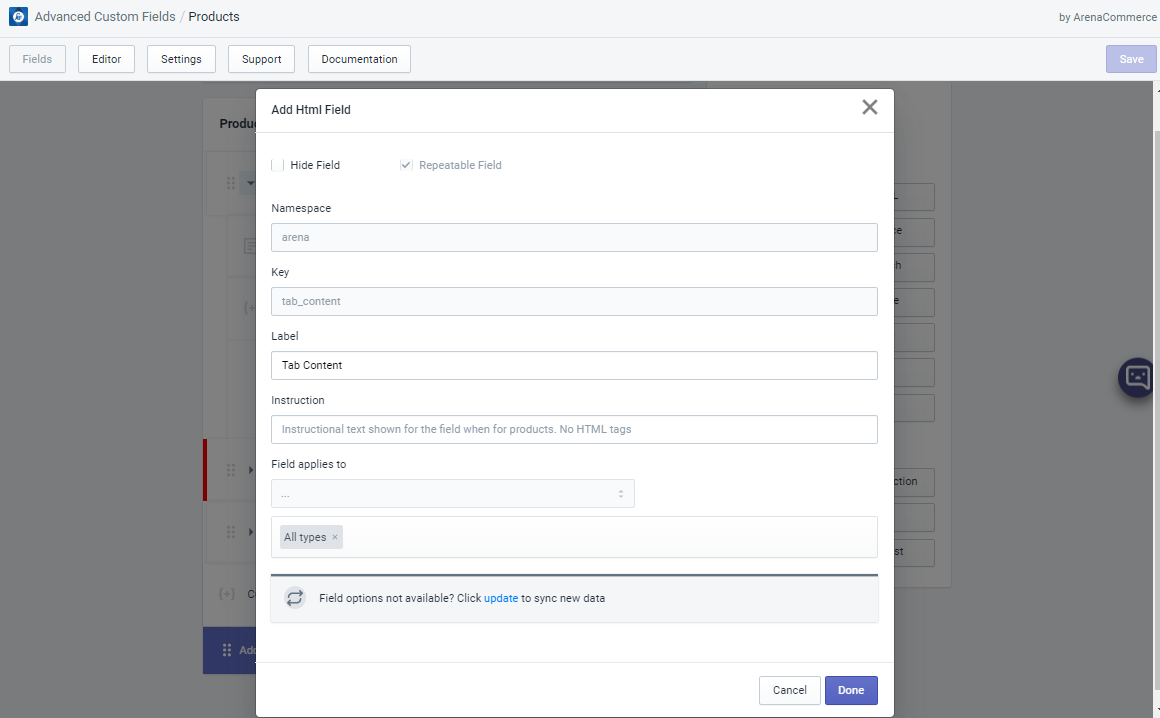
- Step 3: Right below newly create Text field, add an HTML field
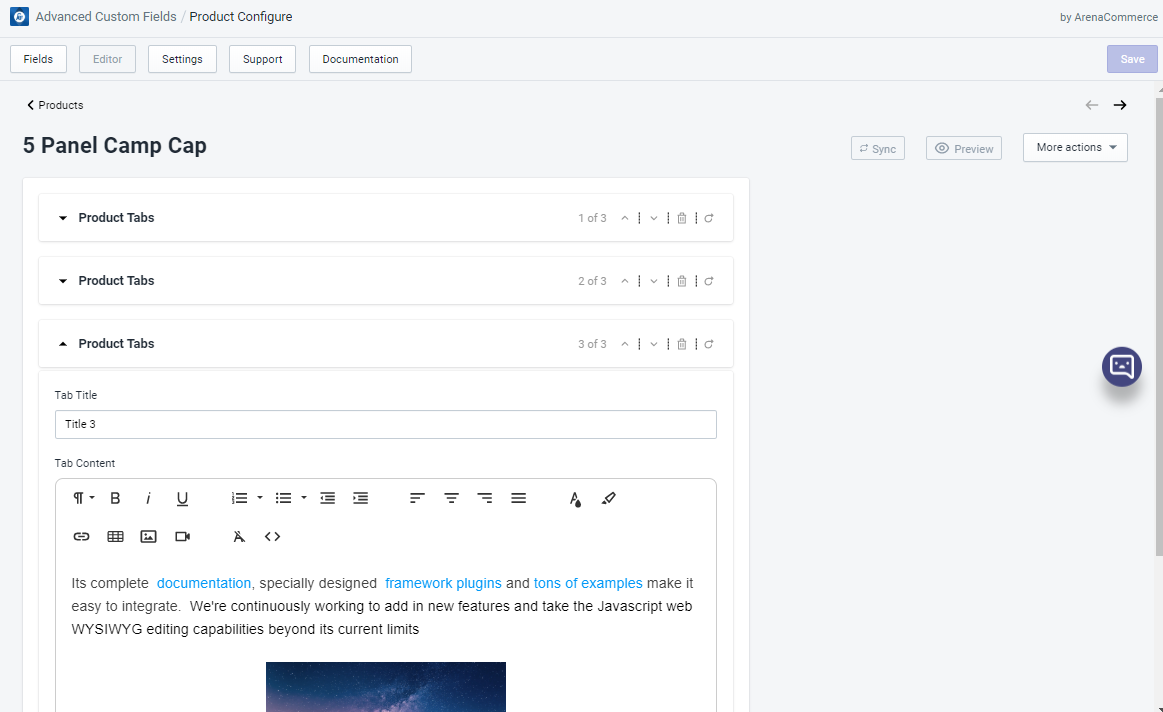
- Step 4: Click Save button to save your changes; then go to Editor tab’s resource Products and pick a product to start with.
- Step 5: Add tab title and tab content. Repeat Product Tabs group to create more tab title and tab content. Always remember to click Save to save your changes.
- Step 6: Download these 2 files vanilla-js-tabs.min.js and vanilla-js-tabs.css.
- Step 7: Go to Edit code, open Assets folder and upload 2 newly downloaded files at step 6.
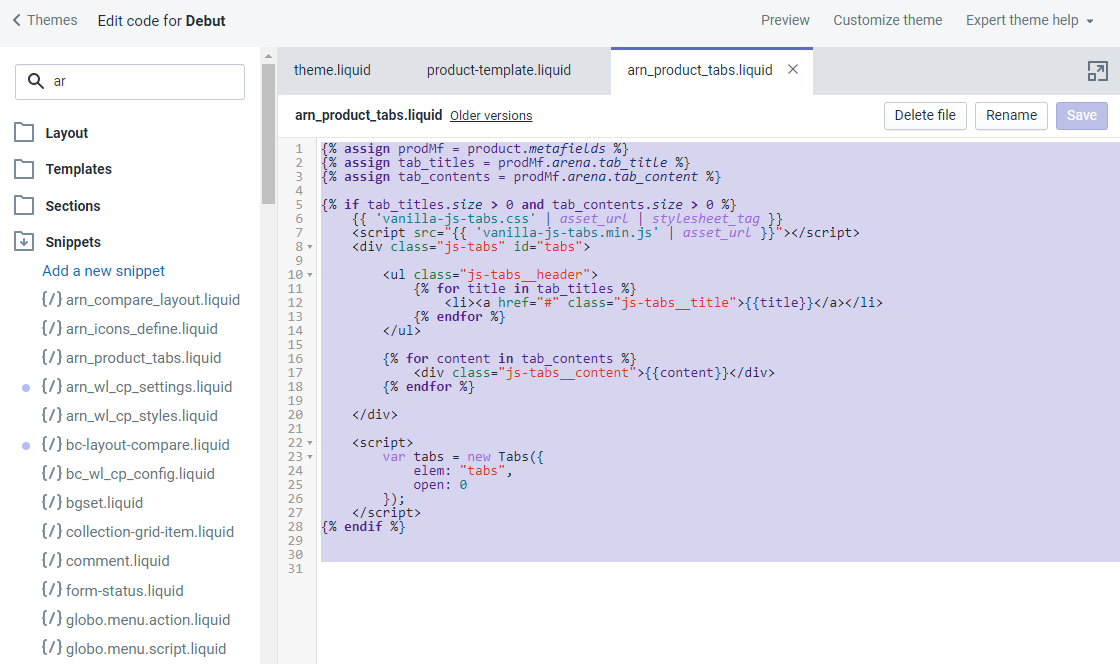
- Step 8: Open Snippets folder then click Add a new snippet and name it arn_product_tabs. Next, copy the following lines of code to the newly created file
- Step 9: Open product-template.liquid file and add
{% include 'arn_product_tabs' %}at where you want the product tabs to show up.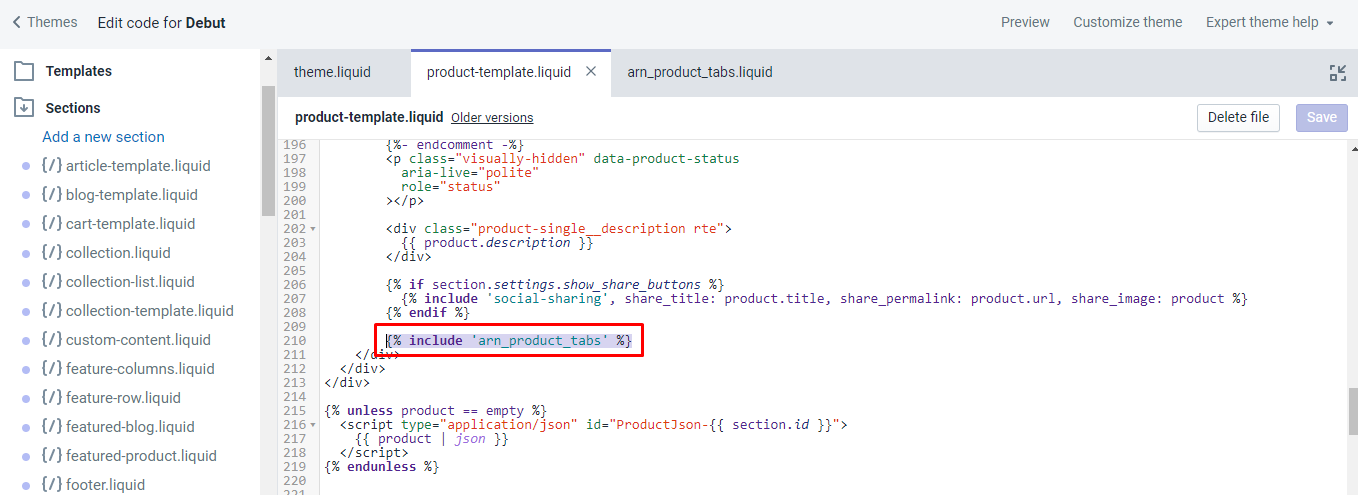
Note:
File product-template.liquid contains main parts of a product page. Different themes may have different names for this file, but its purpose should be all the same.
In can your source code does not have product-template.liquid file, please contact theme author for the main file which makes up the product page.
If the above steps are done correctly, the result should be displayed on corresponding product page.