This is advanced guide, so please make sure you have understand our app well before going forward. If you are still not sure or have not gone through ACF’s basic knowledge, we recommend you go to Advanced Custom Field.
Our examples were created on Shopify’s Debut theme.
In case you have problem applying any examples here to your theme, please submit a support request via our Support Portal; or send email to [email protected].
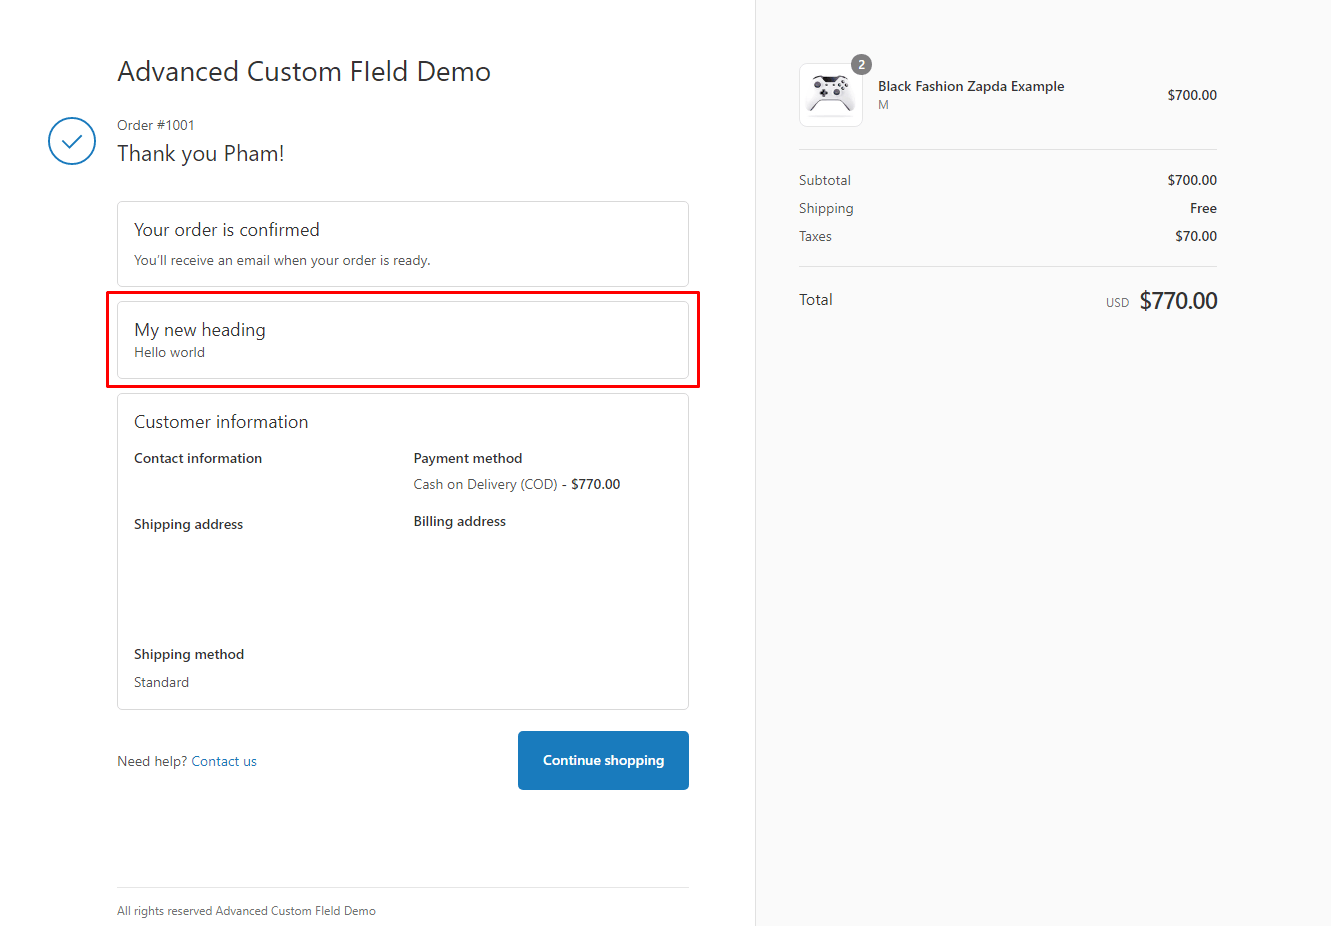
Custom Field (metafield) data about an order can be added to the Order Status page that customers see when they check the status of the order. (Normally when customers submit an order, an email will be sent to them with a link from which they can view their order status).
In order to make this work, there needs to be at least one order on your store.
In this example, we will show you how to achive this:
Step 1: At Fields tab, choose resource Orders and create a type of fields you want (Here in our example we chose Text field.
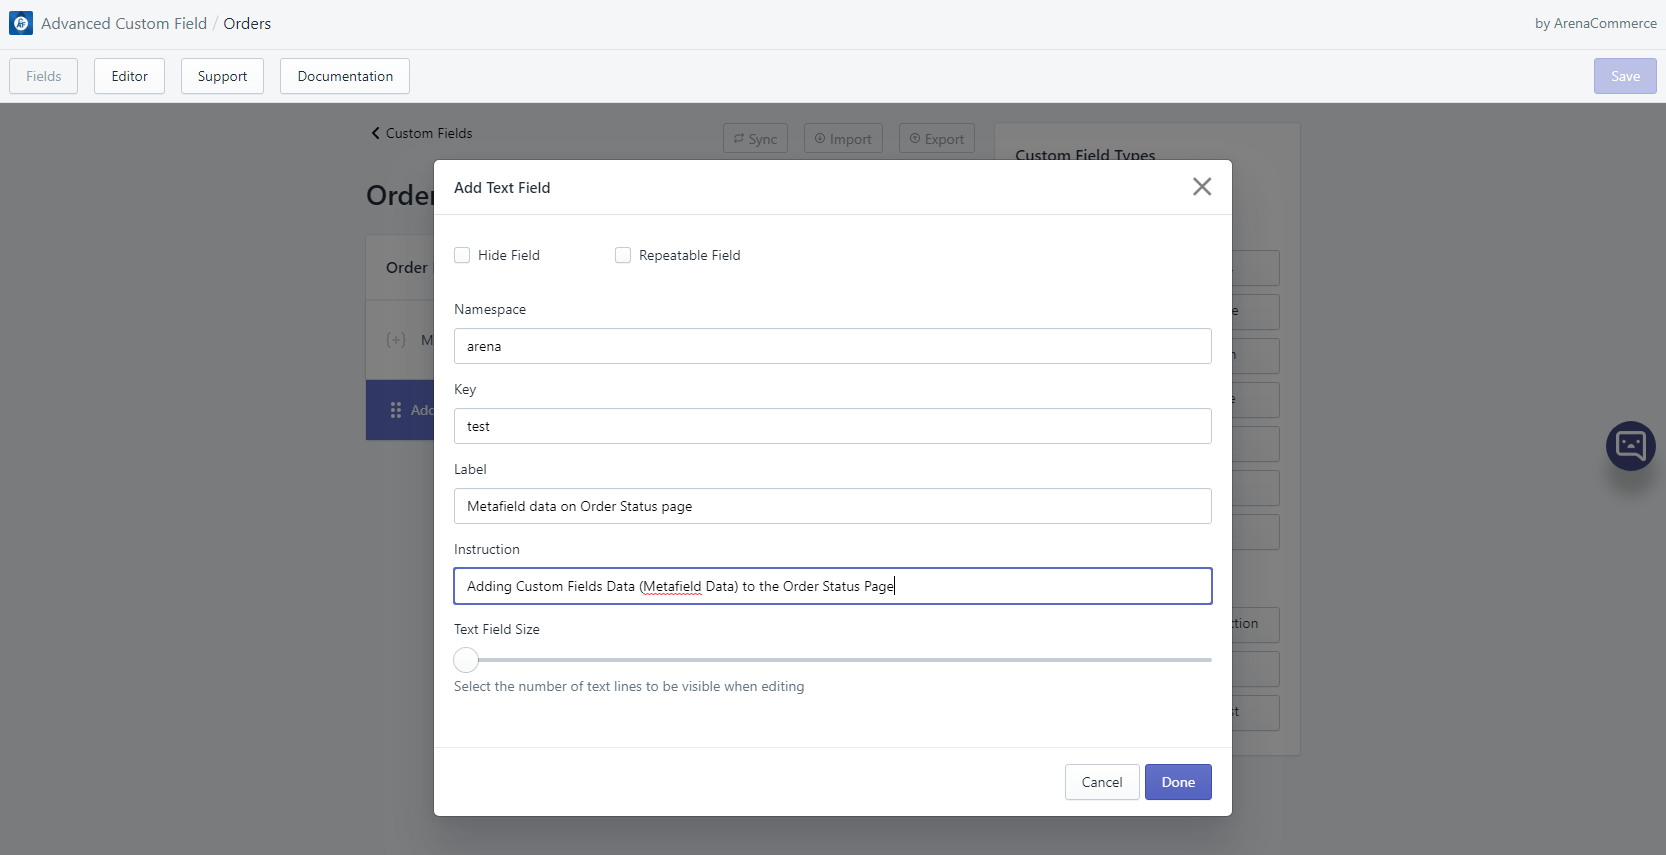
Step 2: Click Save button to save your changes; then go to Editor tab’s resource Orders and pick an order to start with.
Step 3: On next page, add custom field data.
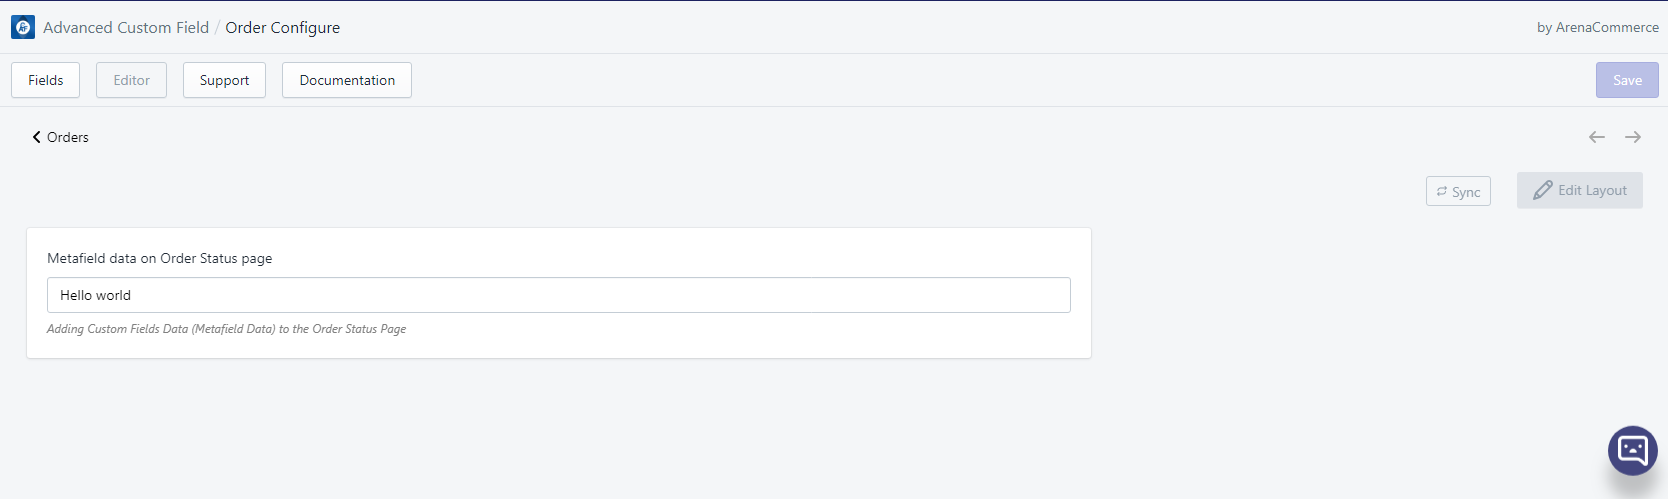
Step 4: Click Save button to save your changes.
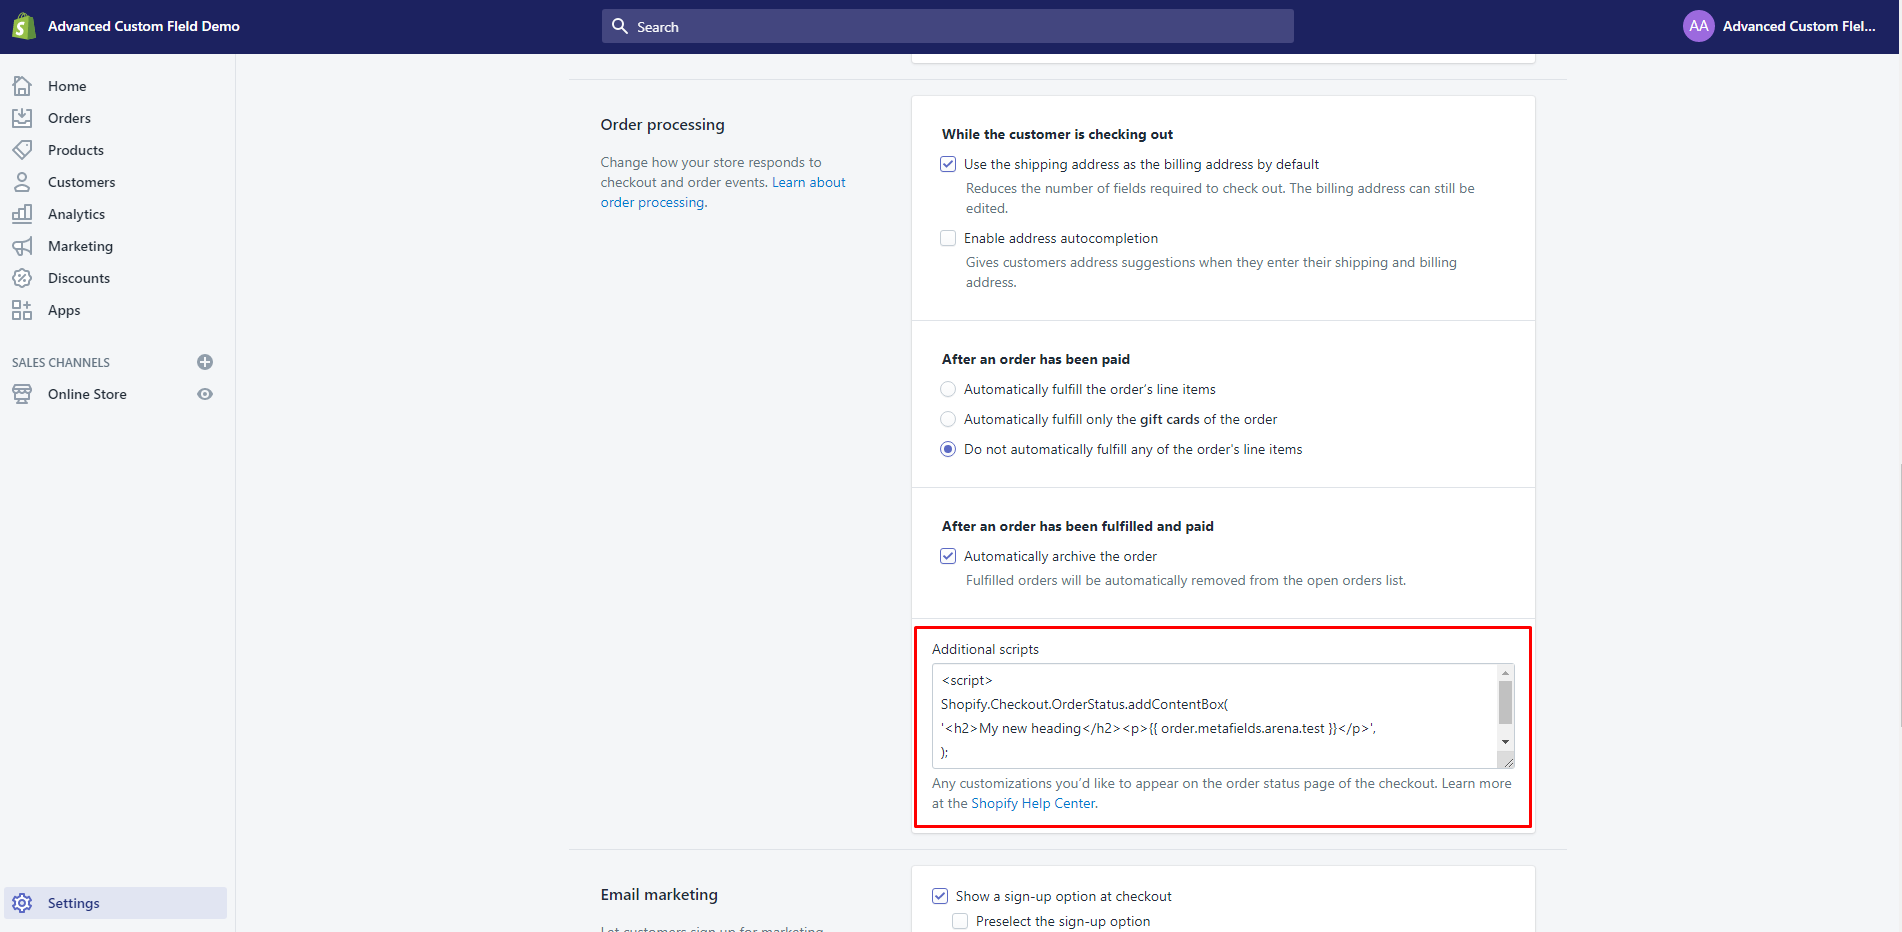
Step 5: In order to make this work, an additional script needs to be added to /admin/Settings/Checkout
This example script adds data from a metafield that is attached to the order itself.
<script>
  Shopify.Checkout.OrderStatus.addContentBox(
    '<h2>My new heading</h2><p>{{ order.metafields.namespace.key }}</p>',
  );
</script>
If the above steps are done correctly, the result should be displayed on Order Status page